Sunday, August 09, 2009

Leather Fringe Tutorial


I’ve gotten so many compliments on this simple necklace that I decided to write a tutorial. I used gemstone beads, which can be hard since the holes aren't usually as large as you need, but you could also you lampwork, crystal and glass beads as well as ceramic and clay. Click the picture to make it larger.

Supplies:
18” 2mm Leather
6’ of .5mm Leather
20 Beads, crystals, gemstones to fit on the .5mm leather
2 Large hole silver beads for 2mm
End Crimps and Clasp
Scissors
Flat Nose Pliers
Ruler


Instructions:

  1. First make sure all your beads will fit on the .5mm leather cord. I string mine on a leftover piece while picking them out.
  2. Cut your 2mm (heavier leather) to 18” or whatever length you choose.
  3. Cut 6 pieces of 6” .5mm leather.
  4. Cut 2 pieces of 5” .5mm leather.
  5. Cut 2 pieces of 4” .5mm leather.
  6. Create a Larks Head knot with all your 6” pieces onto the middle of the 2mm leather.
  7. Add 1 5” piece with a Larks Head knot to each side next to the 6”.
  8. Add 1 4” piece with a Larks Head knot to each side next to the 5”. You should have a graduated look with the leather fringe. Do not worry that the knots are not tight on the 2mm leather. Refer back to the picture if you are concerned that yours may look different.
  9. Starting on one end, add a bead to one leather fringe.
  10. Tie an Overhand knot to secure.
  11. Add another bead to the next fringe and tie a knot.
  12. Continue adding beads and knotting being sure to alternate the placement of your beads. Either high on the fringe or lower close to the end.
  13. Tighten your Larks Head knots by pulling the fringe down.
  14. At this point you may decide to add more fringe. Just scoot your fringe pieces over and add more in between or at the ends.
  15. Add your silver beads to the 2mm leather, one at each end.
  16. Center your fringe and silver beads.
  17. Tie an Overhand knot in the 2mm leather to secure.
  18. Add end crimps and clasp.

As I quickly put this together, please let me know if you have questions or if I need to add more information. Please feel free to use these instructions and repost on your blog or web site just as long as credit is given. Thanks, Dana

Thursday, August 06, 2009

Original All-Bran Muffins

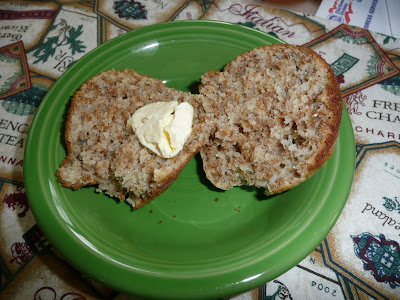
I had to resort to making my own bran muffins this morning as my mother in law who usually makes them is now in an assisted living facility and does not have a stove or oven. I already had purchased the All-Bran, but didn't have the recipe that she uses so I did what any computer savvy person would do and searched the internet and wa-la there it was. Now I don't know if this is the same recipe that she uses or not, but they turned out pretty good. I'll have to take her some later today.


The recipe can be found on Kelloggs.com, but I have reprinted it below. I didn't have fat free milk so I used 2% and I also used Canola oil vs. the Vegetable oil, no other substitutions were made. Please check out the Kellogg website for variations on reduced calories, fat and cholesterol. Enjoy, I know I did this morning.

The Original All-Bran Muffins

Ingredients
1 1/4 cup all-purpose flour
1/2 cup sugar
1 Tablespoon baking powder
1/4 teas. salt
2 cups Ready-To-Eat Cereal All-Bran Original
1 1/4 cups fat free milk
1 egg
1/4 cup vegetable oil

Directions

  1. Stir together flour, sugar, baking powder and salt and set aside.
  2. In a large bowl, combine cereal and milk and let stand for 2 minutes.
  3. Add egg and oil to cereal mixture and beat well.
  4. Add flour mixture and stir until just combined.
  5. Portion evenly into twelve 2 1/2-inch muffin pan cups coated with cooking spray.
  6. Bake at 400 degrees F about 20 minutes or until golden brown.
  7. Serve warm (I also like to have butter on my muffins)


Wednesday, August 05, 2009

Featured Artist Jude McConkey Photography

I just love photos of nature and these by Jude McConkey are wonderful. They have an unearthly feeling that makes you wonder. Here is a little bit more about Jude.

I'm a newspaper photographer by trade, but a fine art photographer by desire. I love using photoshop to enhance my work and prefer dreamy, intense, and yes, even creepy images full of emotion.

Born and raised in Cleveland, Ohio, I now live in the wilds of the Upper Peninsula of Michigan where the winters are long and hard.

My photos have been featured in:
*Lake Superior Magazine *Sports Illustrated Kid's Magazine *Photographer's Forum Best of Photography Annual 2008 *Various newspapers throughout the United States *SaultRealism Fine Art Gallery *Alberta House Gallery *Firebrick Pottery and Gallery


To see more of my images:
www.judemcconkey.com
For any questions or info, contact me here or at jude.mcconkey@gmail.com

Jude has a shop on 1000 Markets that feature some of these wonderful prints. I especially love trees and hers are definitely dreamy. My husband loves trains and this one with the snow is just captivating. Go visit Jude's web site and SHOP on 1000 Markets and see some of the wonderful photographs yourself.

Tuesday, August 04, 2009

Unique and One of a Kind Gifts


I know that we all love to receive gifts that were picked out just for us for Birthday's, Anniversary's, Christmas, Mother's Day, etc. and are always wondering where those wonderful ideas come from. ArtFire has a special Gift page that lets you search for just those unique gifts. The item may be handmade or you could order something special from some of the vendors just for that occasion such as a wedding.

I do have an ArtFire shop as well as 1000 Markets and ETSY, but ArtFire is becoming one of the star selling sites in the handmade gift and unique gift market. If you would like to check out their unique gifts page, check it out HERE.

If you would like to check out some of my items for sale on ArtFire, please visit me at http://danasjewelrydesign.artfire.com/.

If you are into making items yourself and need supplies, then ArFire is also a good choice to check out. I found this fun shop and all it's curiosities. Geeminy Crickets has all kinds of old keys, pocket watch parts, vintage sheet music, papers and images to use for scrapbooking, collage or steampunk jewelry.

If you need a pattern or tutorial to make something yourself, HERE is the page on ArtFire that has a ton of vendors with their tried and true instructions. Yes, my gem tree tutorials are listed in this multitude of talented artists.

Check it out yourself and find a unique gift for that someone special in your life.

Dress Form Jewelry Stand


I know in my last post I said I would do a jewelry tutorial for my leather fringe necklace, but as I was trolling some of my favorite crafting sites I found this tutorial for a jewelry stand. Lots of ideas streaming through my head on how to customize it and make it to match your jewelry displays or bedroom to set on a dresser.

Check out Craft Chi's blog for this great idea.

Getting Behind

For all my followers on Facebook, blog and Twitter, sorry that I am so behind in posting. We have been in Montana for my gem tree competition the past week. I finished obtaining my "Masters" at the National level and as a surprise I was voted into the American Federation Newsletter Editor Hall of Fame. It is a great honor as only 1 or 2 per year in the Nation are voted in.

I promise when I get home there will be a new featured artist and a jewelry how to. I have received several comments on my leather fringe necklace that I thought I would write a tutorial and post out here so everyone can make one.
Had car trouble yesterday and are stuck in Ellensburg for a day to see if they can fix. If now we will just rent a car and drive home today and come back and pick up the car this weekend. It's frustrating to be only a couple of hours away from home.

Hope all is well and will write more when we get home.

LinkWithin

Blog Widget by LinkWithin